How to make an Origami Cube?
Papercraft Series 01: ORIGAMI SHAPES
Episode: 01
After many attempts to folding, unfolding, refolding, measuring and tearing, I shouted in excitement, “Now I became an expert in paper crafts, that too in ORIGAMI!!” Behind me, my sister gently tapped my shoulder saying, “Hey expert! You just learned how to cut a paper into a square!” I blinked for a second and we burst into laughter.

Hey folks, Welcome back!
If you are new here, Hi! Welcome to diarytale!
Here is the first episode of the new series “Origami shapes”. This series consists of 5 episodes. So stick with us, tolerate our sarcastic moments in between, learn some easy crafts with us and show some love by signing up our newsletters for further updates.

Do you remember? These cubes are used in the Easy wall hanging post! If not, take a look at it. Click here: Wall hanging!
Links to the other episodes.
REQUIREMENTS
To start this origami series, You need some
- Papers, (if paper is thick, you will feel hard to fold)
- Scissors,
- time,
- your interest.

STEPS TO MAKE ORIGAMI CUBE
Here are the step by step instructions to make an origami cube.

1. First, cut a paper into squares. Here, I have taken different colors to explain easily. You can go with a single color.

Take 3 square papers.

NOTE: I have used, 10×10 square paper. *(10 centimeters.)
2. Cut the square papers into 2 equal strips. By this time, you will have 6 equal rectangle strips.


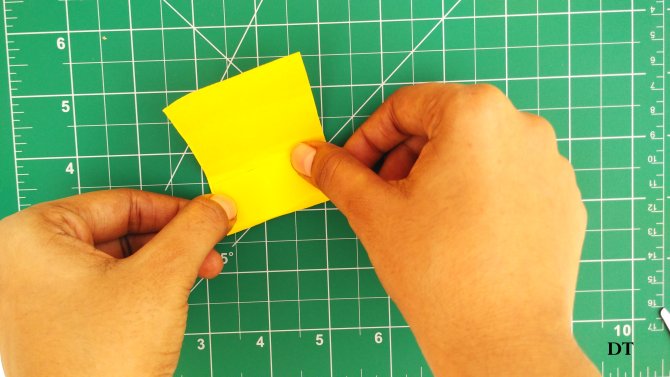
3. Take one strip and fold it in half. Press at the ends to have creases. Now, unfold the paper.


4. With the creases as the guideline, fold the paper from its ends to the crease midline. Do it on the other side.


5. Do it to all the paper strips. You will have a bunch of paper-folding like this.

6. Now it is time to arrange and numbering. Arrange the strips like this.

NOTE: One paper fold in all four sides and two in the middle. So totally 6 paper folds. ( I call the four sides as East, West, North, South. The rest two as Top & Bottom. For easy understanding!)
7. Number it as shown below.

8. Let us start fixing. This is an interesting side. Take the “1” marked paper fold and place it like this. It covers the West-side.


9. Now take no. “2” paper fold and place it in the gap of the first paper fold. It covers the Bottom side.

10. Take no. “3” paper and insert in between “1” and “2” marked paper fold to cover the North side.


11. To cover the East side, take no.4 paper and insert it between “2” and “3” paper folds.


12. Take no.5 paper fold to cover the South side by inserting between 3 and 4.


13. You are almost done! To cover up the Top part, Take the “6” numbered paper fold and insert in the gap.


14. Gently press on all sides to fit perfectly. If you are not getting it, Check the video given below. Don’t lose hope. Try it again.

15. VOILA!! There you are! Origami Cube, done!!

If you carefully note the steps, the opposite sides of the cube will have same color and orientation.
NOTE: If you do this cube in one go, let us know! Comment below or share it on social media!!
As they say,
Fold the models, then teach them to others. If you can learn this form of communication, you will be blessed with a satisfaction that no other art form can give! -Yamaguchi Makoto.
If you find this post on origami cube interesting, share with others. Or if you learned to make, then teach your kids or friends this simple craft.
Comment me below, if you like and find this method easy. Also, connect with us on social media. Links are given below.
- Instagram – @diarytale
- Facebook Page – @diarytale1
- Twitter – @diary_tale
- Google plus – +DiaryTale
- Pinterest – diarytaleDT
*P.S. Thanks for those who showed continuous support via subscription & social media. If you are new here, feel free to subscribe us!
Have a good day!!


Super and easy
Thanks, Divakar!